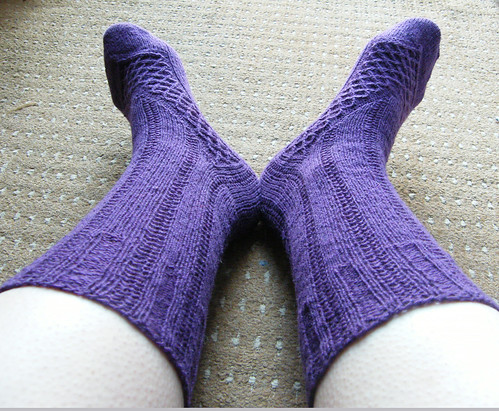
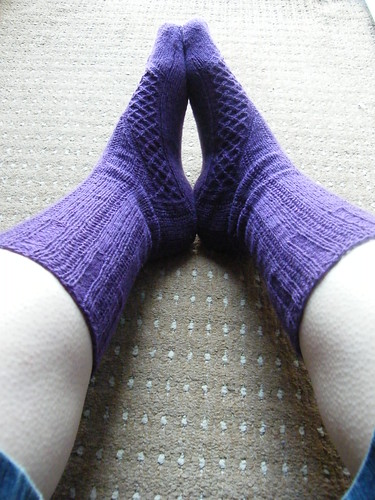

I finished these socks a little while ago. They're the Maeva socks, from knitty.com The designer is Stefanie Bold, and I just love this design of hers! It's another one of those "saw-it-when-the-new-issue-came-out-and-just-had-to-cast-it-on-RIGHT-THEN" type of project.

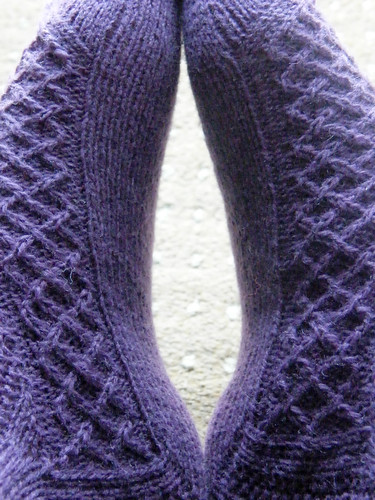
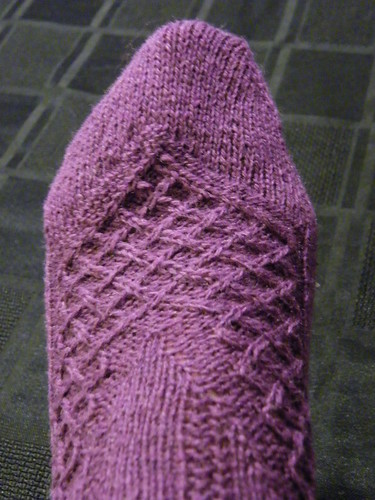
I love the tiny cables going up the side. That's what drew me to the pattern in the first place, the intricate detail Stefanie has designed into the socks. It is all charted out in the pattern, and I found the charts easy to follow for such tiny details.
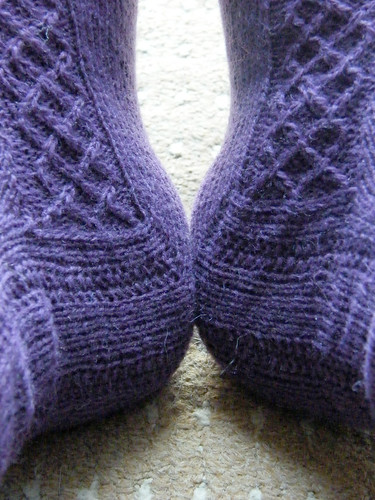
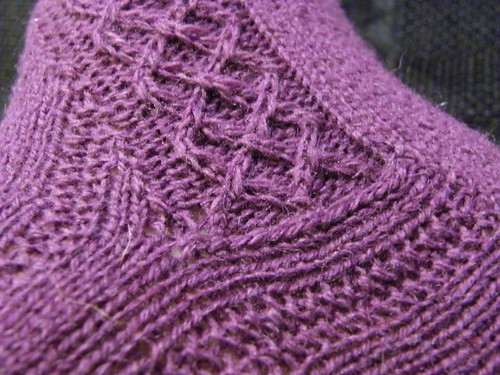
One of my favourite construction details of these socks was the heel. The sock is knitted from the toe up, which nearly put me off knitting them because I don't like short row heels, which is normally what is written into a toe-up sock pattern. But I so much wanted these socks, so I actually read ahead in the pattern (I know, GASP!) and discovered that it was actually a toe-up heel-flap kind of sock. Yay! I love how the heel joins in this kind of sock, it's like magic when you join the heel flap as you're knitting and then it all just appears into a sock heel. I love that knitting two stitches together can make such a 3-dimensional object so cleverly. And heel flaps actually stay on my heel, not like short row heel which just slide all the way off. Very annoying. So, this sock was great in that respect.
I also love how the gusset was increased in order to make the cables run along the edge of the sock, very clever! I think I'd heard something about how increases don't need to be in the traditional triangle shape, but this is the first time I'd tried anything like moving the gusset shaping, and it was such a lightbulb moment when I figured out what was happening.
By the way, the photos on the table top are more accurate for colour. I find getting the right colour to be very awkward in photography. I know everyone says to use natural light, but in this case, sunlight made the purple appear much lighter, and less plummy.
So, the specs and details of how I made these: I made the Small size (9.75" foot length). I used 2mm DPNs for the foot in order to get gauge. Gauge is very important for these socks. I used 2.25 at first and knitted all the way to the heel before I figured this out. The foot was about 2 inches too large :( so I had to start all over again, after having done a swatch to find out my gauge. It's just as well the 2mm needles worked, I don't have anything smaller! Although, thinking about it, she has provided directions for 4 different sizes. But it didn't occur to me to do math. I'd suggest trying very hard for gauge first :)
I then went up to 2.5mm needles immediately after the heel turn, and also increased from 60sts to 64sts to accommodate my ahem, insulated ankles. That's the needle size and stitch count that I normally use, and it works for my legs. It wasn't hard to fit into the rib pattern, in fact the size up uses 64sts so I could have followed the chart for that, but by that point, I had it figured out.
I love these socks! I love all the detail in the pattern, and it's so well written. To anyone scared by all the tiny cables, I'd say don't worry. If you can cable and have made socks before, just follow the pattern and you'll be OK, it's very clear and manageable, with all the parts of the foot broken down into individual charts. So, definitely a recommended pattern! Go, knit! :D
3 comments:
Beautiful socks! I love all the socks out there, but I suffer terribly from the second sock syndrome...
wow, those socks are extraordinary!! Love the colour, and the details are amazing. Great job!!
They are absolutely gorgeous. For all the trouble you had you did a wonderful job!
Post a Comment